

Additional Information
What is Solarbit?
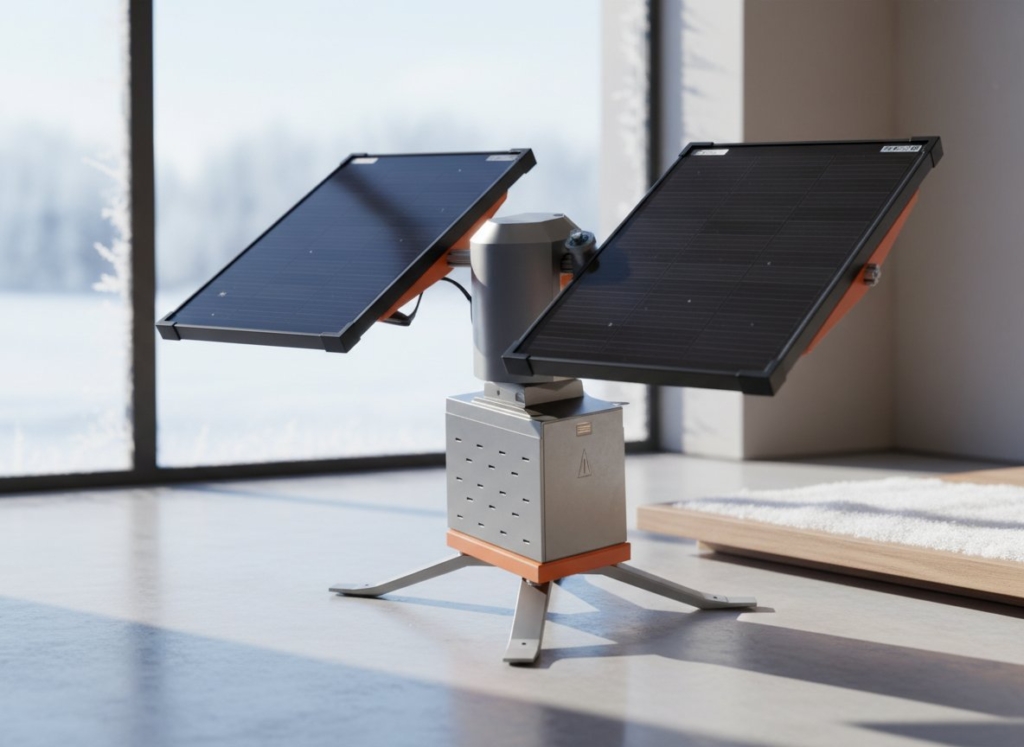
Solarbit is a mostly 3D printed, self-sufficient, offgrid capable, Solar Tracker device that maximizes energy capture by following the Sun. Equipped with two solar panels, Solarbit uses advanced automation to track the sun’s movement throughout the day, ensuring optimal energy production. This energy is stored in a battery (battery not included), which can power things like bitcoin miners, nodes, beercoolers, rc-cars and a myriad of other things.
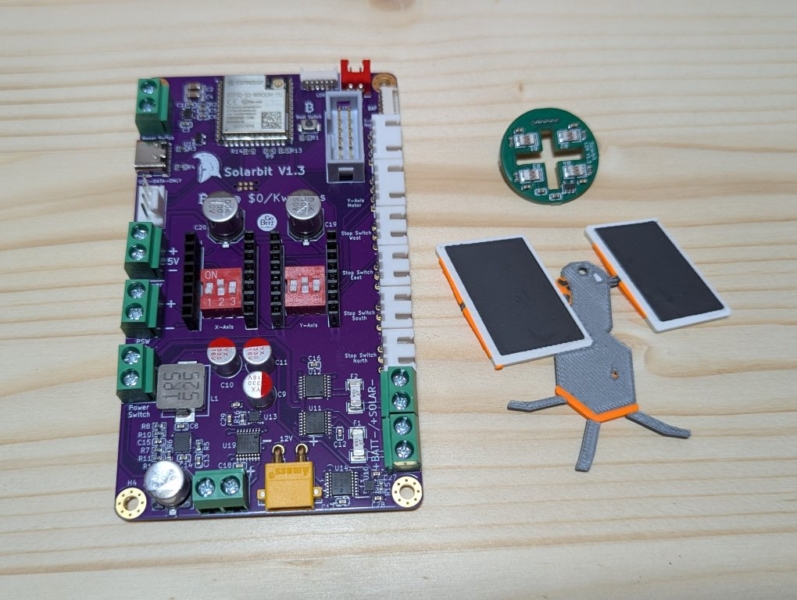
To build a Solarbit, you need the printed parts, hardware and our two proprietary circuit boards. Aside from the printed parts and the circuit boards, everything can be sourced yourself. Links to the BOM, Firmware and everything else that’s needed can be found below.
The Big Solarbit Print File!
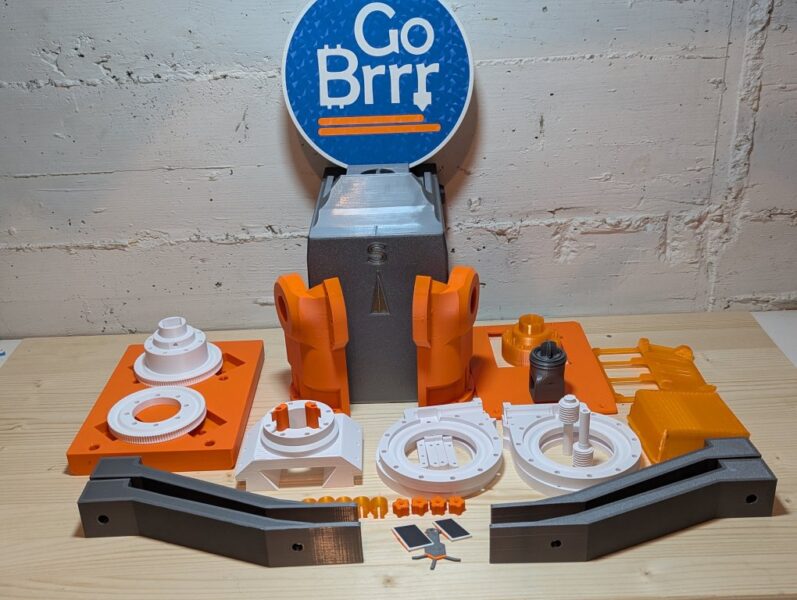
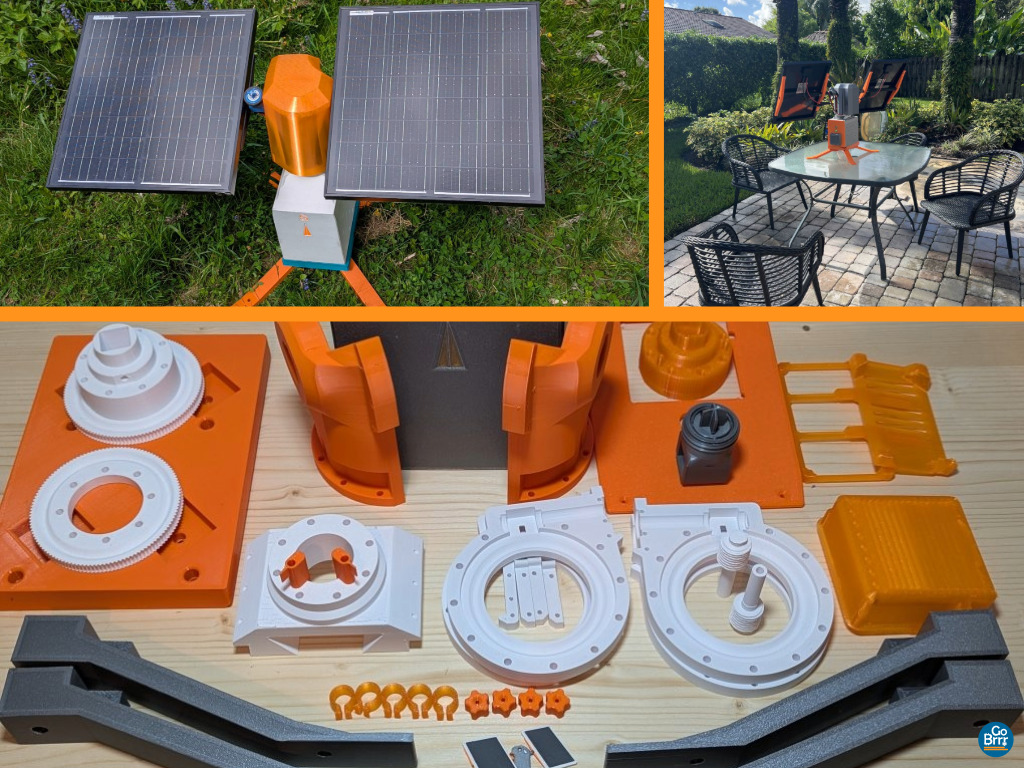
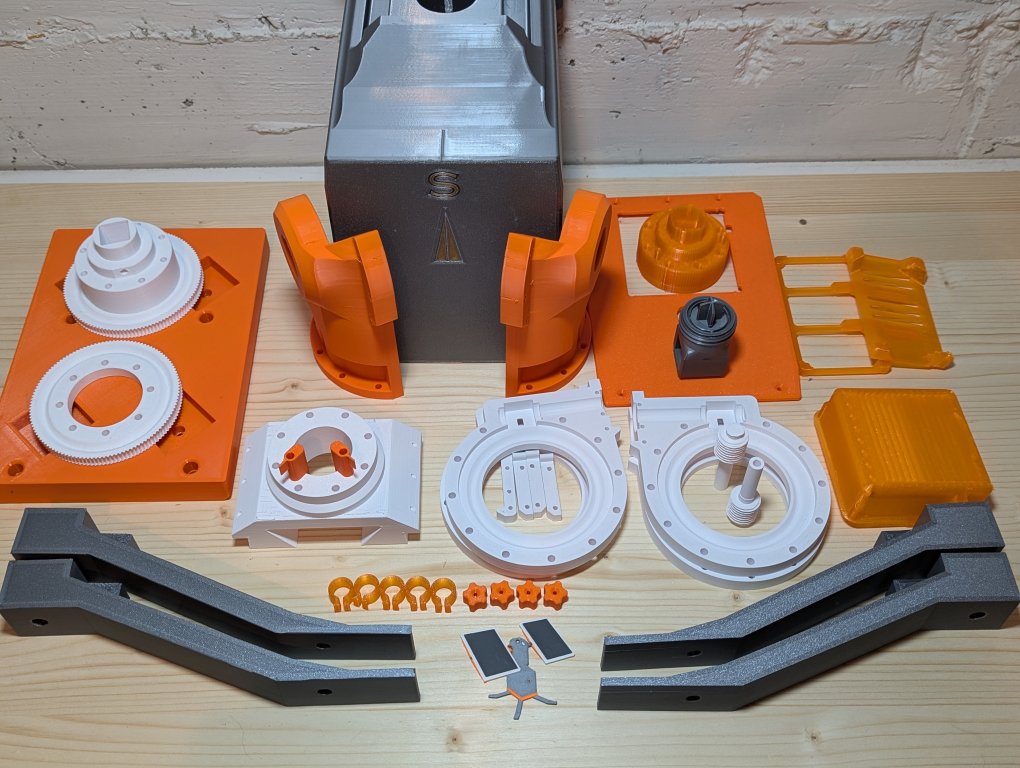
This is it, almost two years of work condensed into one .3mf which contains all the 3D-printed parts required to build a Solarbit.
But where are the STLs?
STL is an outdated, format, 3MF is the proper 3D-print file format and you can always export STLs from it if needed. Or just unzip it to access the raw files, 3MF is a container file like a ZIP.
All plates are labeled and all parts are named to make it as easy as possible. Parts of which you need multiple are properly multiplied on the plates. (Not the case for optional parts like panel holders).
Mandatory Parts:
1. Hood Cover
2. 80 Fan Guard
3. Y Axis Limit switch Trigger
4. Leg
5. Bitaxe Mount
6. Solarbit PCB Mount
7. Cable Clips
8. Screw Handles for Door
9. LDR Mount
10. LDR Housing
11. LDR CoverNut
12. GearboxHandCrank
13. Subframe
14. Y axis Bracket (L & R)
15. Door (80mm Fan)
16. Gearbox Hull (P1 & P2)
17. Worm Gear
18. X Gear
19. Y Gear
20. MotorMountBrackets
21. CableGuard X
Optional Parts:
Plates with optional parts are labeled as such. If you choose to use the door with the 120mm fan or the XT60, make sure to print the relevant files for your setup instead of the standard door and fan guard which are meant for the 80mm fan and no XT60 connector.
Solar Panel Mounts are included for some panels we used, there’s also a file of an adjustable panel holder, if you use the adjustable holder, make sure to use washers to fix the sliding nuts into place, otherwise you will damage your unit.
Materials: PETG works, but with cheap PETG, you might run into deforming or warping problems in very high temperature regions. PCTG is my personal favorite for this project.
Preconfigured settings were created for PETG/PCTG.
ASA is probably the optimal choice, but can be challenging to print, add brims to large parts.
Print Settings:
Parts are preoriented on the plates, plates are locked because auto orient will not choose the optimal orientation for all of them.
There is a Solarbit print profile, but most of the parts on the plates are configured with „per part settings“. If you apply your own print settings or do not adhere to the verified settings which are preconfigured, you are on your own. I recommend you just sync your filaments and leave the settings as they are. Settings were created for the Bambu Lab P1S, but will work fine with other printers as long as they are modern and capable machines.
Additional Resources:
Purchase Solarbits, DIY Kits & Parts

Now go build a Solarbit!